Creating a custom post type requires you to add code to your theme’s functions.php file. Normally, we don’t recommend this to anyone but advanced users because even a slight mistake can break your site. Also, if you update your theme, then the code would be erased.
However, we will be using WPCode, the easiest and safest way for anyone to add custom code to your WordPress website.
With WPCode, you can add custom snippets, as well as activate a lot of features from its built-in, pre-configured code library that can replace many dedicated or single-use plugins you may have installed.
First, you will need to install and activate the free WPCode plugin. For detailed instructions, check out our step-by-step guide on how to install a WordPress plugin.
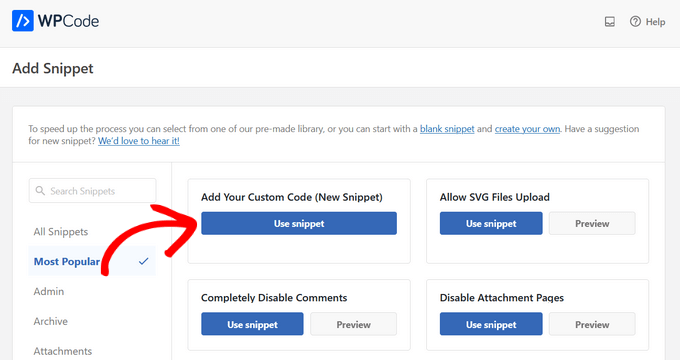
Once activated, navigate to Code Snippets » Add Snippet in your WordPress dashboard. Hove your mouse over ‘Add Your Custom Code (New Snippet),’ and then click ‘Use Snippet.’
Next, you will be taken to the ‘Create Custom Snippet’ screen.
Now, you can give your code snippet a title and toggle the switch to ‘Active.’
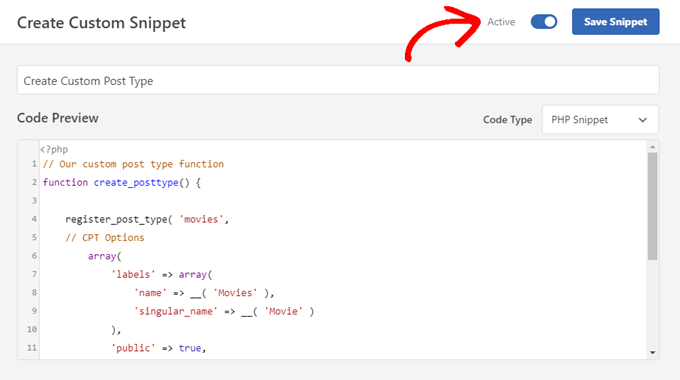
After that, just paste the following code into the ‘Code Preview’ area. This code creates a basic custom post type called ‘Movies’ that will appear in your admin sidebar, and it will work with any theme.
// Our custom post type functionfunction create_posttype() { register_post_type( 'movies', // CPT Options array( 'labels' => array( 'name' => __( 'Movies' ), 'singular_name' => __( 'Movie' ) ), 'public' => true, 'has_archive' => true, 'rewrite' => array('slug' => 'movies'), 'show_in_rest' => true, ) );}// Hooking up our function to theme setupadd_action( 'init', 'create_posttype' );If you just want a basic custom post type, then just replace the movies and Movies with your own CPT slug and name and click the ‘Update’ button.
However, if you want even more options for your custom post type, use the following code instead of the one above.
The code below adds many more options to the ‘Movies’ custom post type such as support for revisions, featured images, custom fields, as well as associating the custom post type with a custom taxonomy called ‘genres.’
Note: Do not combine these two snippets or WordPress will give you an error because both snippets register the same custom post type. We recommend creating a whole new snippet using WPCode for each additional post type you want to register.
/** Creating a function to create our CPT*/ function custom_post_type() { // Set UI labels for Custom Post Type $labels = array( 'name' => _x( 'Movies', 'Post Type General Name', 'twentytwentyone' ), 'singular_name' => _x( 'Movie', 'Post Type Singular Name', 'twentytwentyone' ), 'menu_name' => __( 'Movies', 'twentytwentyone' ), 'parent_item_colon' => __( 'Parent Movie', 'twentytwentyone' ), 'all_items' => __( 'All Movies', 'twentytwentyone' ), 'view_item' => __( 'View Movie', 'twentytwentyone' ), 'add_new_item' => __( 'Add New Movie', 'twentytwentyone' ), 'add_new' => __( 'Add New', 'twentytwentyone' ), 'edit_item' => __( 'Edit Movie', 'twentytwentyone' ), 'update_item' => __( 'Update Movie', 'twentytwentyone' ), 'search_items' => __( 'Search Movie', 'twentytwentyone' ), 'not_found' => __( 'Not Found', 'twentytwentyone' ), 'not_found_in_trash' => __( 'Not found in Trash', 'twentytwentyone' ), ); // Set other options for Custom Post Type $args = array( 'label' => __( 'movies', 'twentytwentyone' ), 'description' => __( 'Movie news and reviews', 'twentytwentyone' ), 'labels' => $labels, // Features this CPT supports in Post Editor 'supports' => array( 'title', 'editor', 'excerpt', 'author', 'thumbnail', 'comments', 'revisions', 'custom-fields', ), // You can associate this CPT with a taxonomy or custom taxonomy. 'taxonomies' => array( 'genres' ), /* A hierarchical CPT is like Pages and can have * Parent and child items. A non-hierarchical CPT * is like Posts. */ 'hierarchical' => false, 'public' => true, 'show_ui' => true, 'show_in_menu' => true, 'show_in_nav_menus' => true, 'show_in_admin_bar' => true, 'menu_position' => 5, 'can_export' => true, 'has_archive' => true, 'exclude_from_search' => false, 'publicly_queryable' => true, 'capability_type' => 'post', 'show_in_rest' => true, ); // Registering your Custom Post Type register_post_type( 'movies', $args ); } /* Hook into the 'init' action so that the function* Containing our post type registration is not * unnecessarily executed. */ add_action( 'init', 'custom_post_type', 0 );You may also notice the part where we have set the hierarchical value to false. If you would like your custom post type to behave like Pages rather than Posts, then you can set this value to true.
Another thing to notice is the repeated usage of the twentytwentyone string, this is called the Text Domain. If your theme is translation ready and you want your custom post types to be translated, then you will need to mention the text domain used by your theme.
You can find your theme’s text domain inside style.css file in your theme directory or by going to Appearance » Theme File Editor in your admin panel. The text domain will be mentioned in the header of the file.

Simply replace twentytwentyone with your own theme’s Text Domain.
Once you’re happy with the changes, simply click the ‘Update’ button and WPCode will handle the rest.
Another easy way to create a custom post type in WordPress is by using a plugin. This method is recommended for beginners because it is safe and super easy.
The first thing you need to do is install and activate the Custom Post Type UI plugin. For more details, see our step-by-step guide on how to install a WordPress plugin.
Upon activation, you need to go to CPT UI » Add / Edit Post Types to create a new custom post type. You should be on the ‘Add New Post Type’ tab.
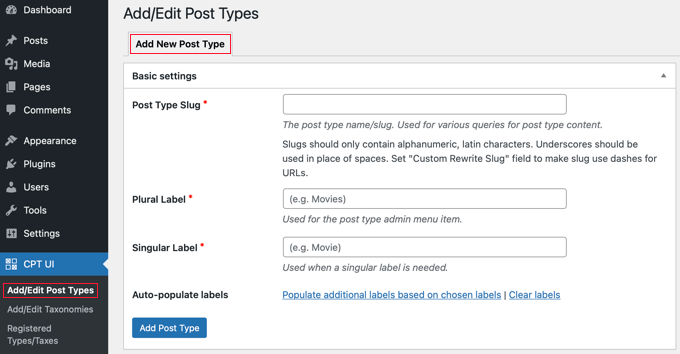
First, you need to provide a slug for your custom post type, such as ‘movies’. This slug will be used in the URL and in WordPress queries, so it can only contain letters and numbers. Below that, you need to provide the plural and singular names for your custom post type.
After that, if you like you can click on the link that says ‘Populate additional labels based on chosen labels’. This will automatically fill in the additional label fields down below and will usually save you time.
Now you can scroll down to that ‘Additional Labels’ section. If you didn’t click the link we mentioned, you will now need to provide a description for your post type and change labels.
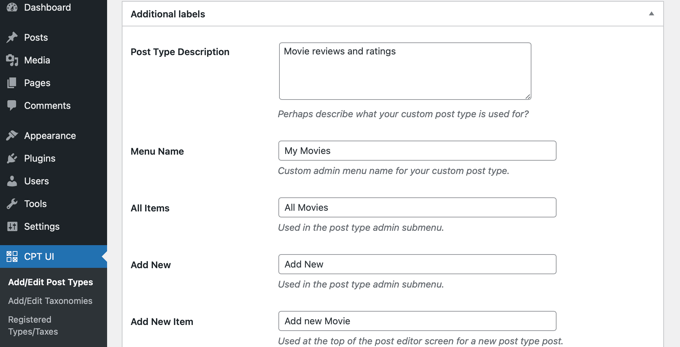
These labels will be used throughout the WordPress user interface when you are managing content in that particular post type.
Next comes the post type settings. From here you can set up different attributes for your post type. Each option comes with a brief description explaining what it does.
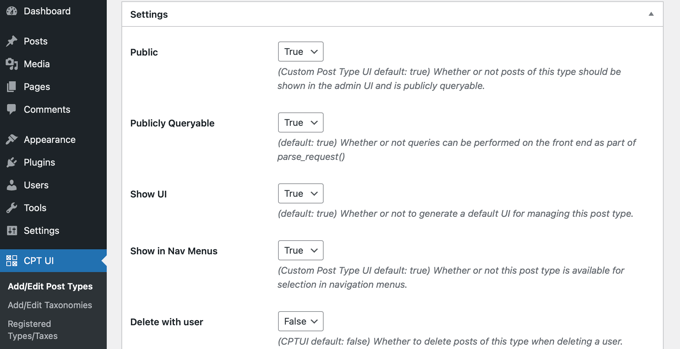
For instance, you can choose not to make a post type hierarchical like pages or sort chronological posts in reverse.
Below the general settings, you will see the option to select which editing features this post type would support. Simply check the options that you want to be included.
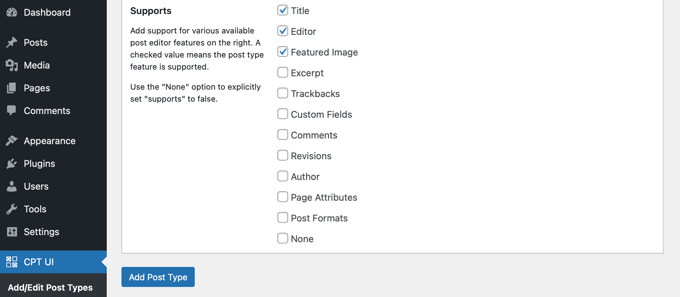
Finally, click on the ‘Add Post Type’ button to save and create your custom post type.
That’s all. You have successfully created your custom post type and can go ahead and start adding content.
WordPress comes with built-in support for displaying your custom post types. Once you have added a few items to your new custom post type, it is time to display them on your website.
There are a few methods that you can use, and each one has its own benefits.
Displaying Custom Post Types Using Default Archive Template
First, you can simply go to Appearance » Menus and add a custom link to your menu. This custom link is the link to your custom post type.
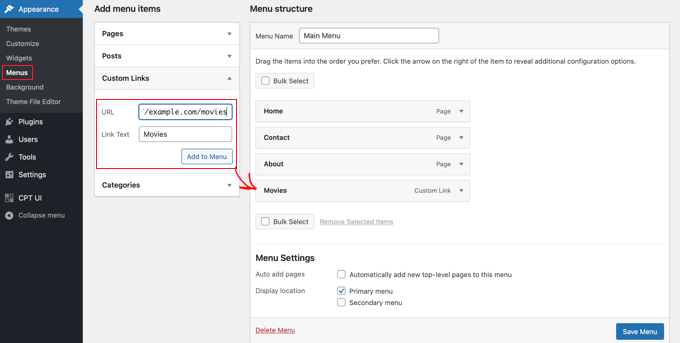
If you are using SEO-friendly permalinks, then your custom post type’s URL will most likely be something like this:
http://example.com/movies
If you are not using SEO-friendly permalinks, then your custom post type URL will be something like this:
http://example.com/?post_type=movies
Don’t forget to replace ‘example.com’ with your own domain name and ‘movies’ with your custom post type name.
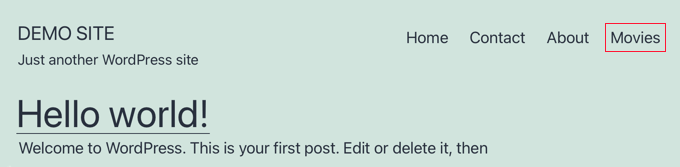
Save your menu and then visit the front end of your website. You will see the new menu item you added, and when you click on it, it will display your custom post type’s archive page using the archive.php template file in your theme.
Creating Custom Post Type Templates
If you don’t like the appearance of the archive page for your custom post type, then you can use a dedicated template for custom post type archives.
All you need to do is create a new file in your theme directory and name it archive-movies.php. Make sure you replace ‘movies’ with the name of your custom post type.
To get started, you can copy the contents of your theme’s archive.php file into the archive-movies.php template and then modify it to meet your needs.
Now whenever the archive page for your custom post type is accessed, this template will be used to display it.
Similarly, you can also create a custom template for your post type’s single entry display. To do that you need to create single-movies.php in your theme directory. Don’t forget to replace ‘movies’ with the name of your custom post type.
You can get started by copying the contents of your theme’s single.php template into the single-movies.php template and then start modifying it to meet your needs.
To learn more, see our guide on how to create custom single post templates in WordPress.
Displaying Custom Post Types on The Front Page
One advantage of using custom post types is that it keeps your custom content types separate from your regular posts. However, if you like, you can display custom post types on your website’s front page.
Simply add this code as a new snippet using the free WPCode plugin. Please see the section of this article on manually adding code for detailed instructions.
add_action( 'pre_get_posts', 'add_my_post_types_to_query' ); function add_my_post_types_to_query( $query ) { if ( is_home() && $query->is_main_query() ) $query->set( 'post_type', array( 'post', 'movies' ) ); return $query;}Don’t forget to replace ‘movies’ with your custom post type.
Querying Custom Post Types
If you are familiar with coding and would like to run loop queries in your templates, then here is how to do that. By querying the database, you can retrieve items from a custom post type.
You will need to copy the following code snippet into the template where you wish to display the custom post type.
<?php $args = array( 'post_type' => 'movies', 'posts_per_page' => 10 );$the_query = new WP_Query( $args ); ?><?php if ( $the_query->have_posts() ) : ?><?php while ( $the_query->have_posts() ) : $the_query->the_post(); ?><h2><?php the_title(); ?></h2><div class="entry-content"><?php the_content(); ?> </div><?php endwhile;wp_reset_postdata(); ?><?php else: ?><p><?php _e( 'Sorry, no posts matched your criteria.' ); ?></p><?php endif; ?>This code defines the post type and number of posts per page in the arguments for our new WP_Query class. It then runs the query, retrieves the posts, and displays them inside the loop.
Displaying Custom Post Types in Widgets
You will notice that there is a default widget in WordPress to display recent posts, but it does not allow you to choose a custom post type.
What if you wanted to display the latest entries from your newly created post type in a widget? There is an easy way to do this.
The first thing you need to do is install and activate the Custom Post Type Widgets plugin. For more details, see our step-by-step guide on how to install a WordPress plugin.
Upon activation, simply go to Appearance » Widgets and drag and drop the ‘Recent Posts (Custom Post Type)’ widget to a sidebar.
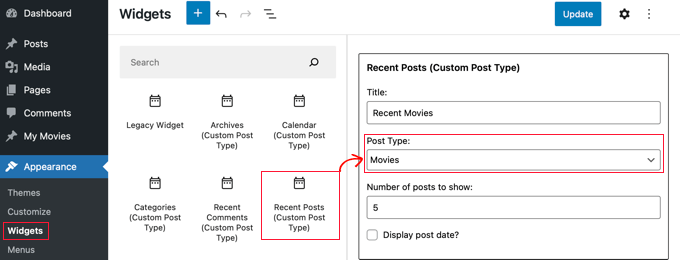
This widget allows you to show recent posts from any post type. You need to select your custom post type from the ‘Post Type’ dropdown and select the options you want.
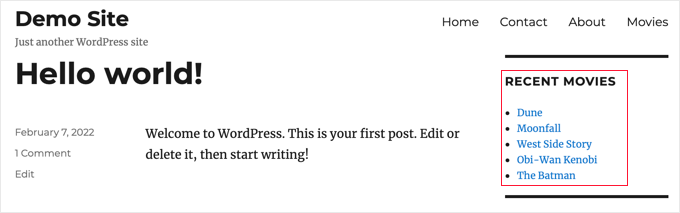
After that, make sure you click the ‘Update’ button at the top of the screen and then visit your website to see the widget in action.
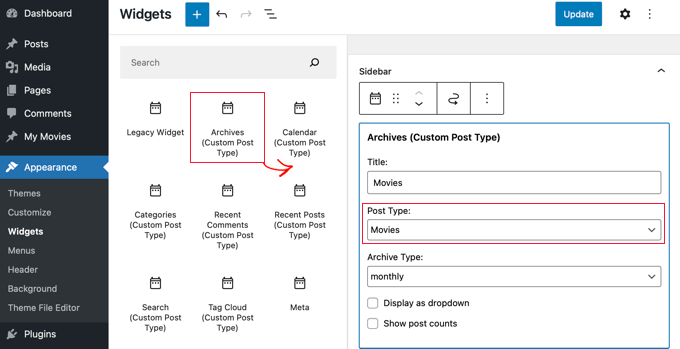
The plugin also provides custom post type widgets that display archives, a calendar, categories, recent comments, search, and a tag cloud.
We hope this tutorial helped you learn how to create custom post types in WordPress.